Healthy Beetroot Hummus
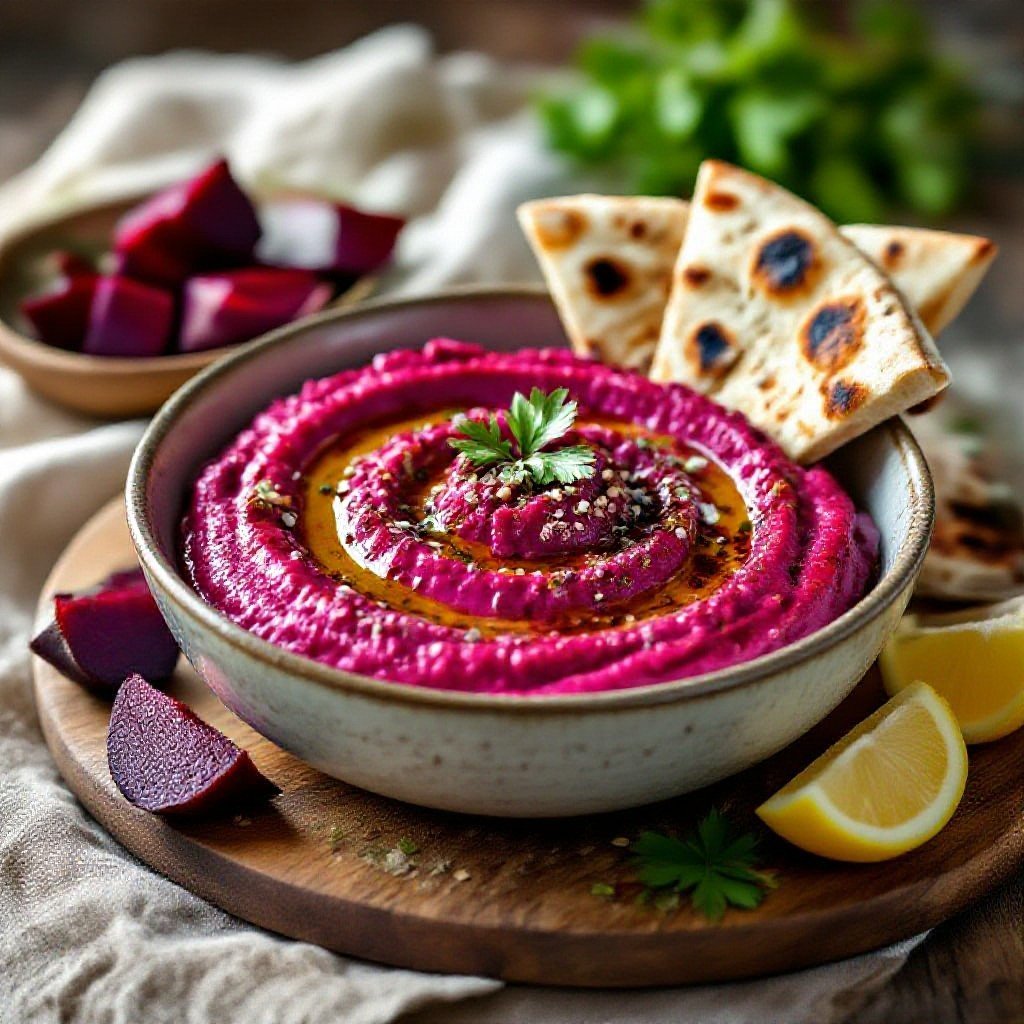
You’ll transform your snack game with this vibrant beetroot hummus that packs earthy sweetness and serious nutrition into every scoop. The natural pigments from roasted beets create that stunning pink hue while adding folate, fiber, and antioxidants to traditional chickpea hummus. It’s dead simple to make and tastes way better than anything you’d grab at the store.
Key Takeaways:
- Beetroot hummus delivers the same protein and fiber punch as traditional hummus – around 5 grams of protein and 4 grams of fiber per serving – while sneaking in extra folate, potassium, and natural nitrates from the beets that support healthy blood pressure.
- The vibrant magenta color comes from betalains, the same antioxidant compounds that make beets red, and you’ll get the best hue using roasted beets rather than canned (which can turn the hummus slightly muddy).
- This dip works as a complete meal component, not just a snack – spread it thick on grain bowls, use it as a sandwich spread instead of mayo, or thin it with a bit of water to make a creamy salad dressing that actually keeps you full.
Why I’m actually obsessed with beets
Beets transformed from something I’d politely push around my plate to an ingredient I genuinely crave. You know that earthy, slightly sweet flavor that some people describe as “tasting like dirt”? That’s exactly what grew on me. Once you get past any preconceived notions, you’ll discover they’re incredibly versatile and add this gorgeous color to literally anything you make.
My obsession started when I realized how much natural energy I had after eating them regularly. Your body processes the natural nitrates in beets differently than you might expect, converting them into compounds that actually support blood flow and oxygen delivery. That post-lunch slump? Way less intense when I’d had beets for breakfast or lunch.
Roasting them changed everything for me, though. Raw beets are fine, but roasted ones develop this caramelized sweetness that makes them almost dessert-like. The texture becomes tender, the flavors concentrate, and suddenly you’re dealing with something that tastes complex and interesting rather than just “healthy.”
They aren’t just for salads, trust me
Beets work in places you’d never expect them to show up. I’ve blended them into brownies (seriously, the moisture and natural sweetness are perfect), stirred them into pasta dough for the most Instagram-worthy noodles, and even juiced them with apples and ginger for a morning pick-me-up. This hummus is just one example of how they can completely reinvent a classic recipe.
Pickling them is another game-changer if you haven’t tried it yet. You get all that tangy, vinegary punch combined with their natural sweetness, and they’ll last in your fridge for weeks. I throw pickled beets on grain bowls, sandwiches, and even alongside eggs for breakfast. The pickling liquid itself becomes this beautiful pink vinegar you can use in salad dressings.
Soup is where beets really shine if you want comfort food. Borscht might be the most famous example, but you can make creamy beet soups, chilled summer versions, or even blend them into tomato soup for extra depth. The color alone makes any soup feel special and fancy, even when you’ve just thrown everything into a pot and called it dinner.
What’s inside these purple powerhouses
Folate sits at the top of the nutrient list when it comes to beets. Your body needs this B-vitamin for DNA synthesis and cell division, which is why pregnant women are always told to eat their folate-rich foods. One cup of cooked beets gives you a solid amount of your daily requirement without having to think about supplements.
Fiber content in beets keeps your digestive system moving along smoothly. You’re getting both soluble and insoluble fiber, which means you’re feeding the good bacteria in your gut while also helping everything stay regular. That combination of fiber types is part of why beets leave you feeling satisfied after eating them.
Manganese and potassium round out the mineral profile in ways that support bone health and blood pressure regulation. Your body uses manganese for everything from processing cholesterol to forming connective tissue. Potassium helps balance out all the sodium most of us consume way too much of, making beets a smart choice if you’re watching your blood pressure.
Betalains give beets their signature color and act as powerful antioxidants in your body. These pigments aren’t found in many other foods, so eating beets regularly means you’re getting a unique set of protective compounds. Some research suggests betalains may help reduce inflammation and protect your cells from oxidative stress, though scientists are still studying exactly how they work. Don’t panic if you notice pink or red urine after eating lots of beets – it’s completely harmless and just means your body is processing those betalain pigments.
How do you get that perfect neon pink look?
Achieving that vibrant, Instagram-worthy pink color isn’t just about tossing raw beets into your food processor and hoping for the best. You need to prep them properly, and the method you choose makes all the difference. Raw beets will give you color, sure, but they’ll also give you an earthy, almost dirt-like taste that completely overpowers the chickpeas. Nobody wants that.
The secret lies in cooking your beets until they’re tender all the way through, then letting them cool completely before blending. This transforms their flavor from harsh and vegetal to sweet and mellow. When you blend cooked beets with chickpeas, tahini, and lemon juice, the natural pigments distribute evenly throughout the mixture, creating that stunning fuchsia hue that makes people stop scrolling.
Temperature matters more than you’d think. Cold beets blend more smoothly and maintain their color better than warm ones. If you’re impatient and throw hot beets into the mix, you’ll end up with a muddy brown-pink instead of that electric color you’re after. Give them at least 30 minutes to cool down, or stick them in the fridge for 15.
Roasted vs. boiled: the real deal
Roasting beets at 400°F wrapped in foil intensifies their natural sweetness and concentrates their flavor in a way that boiling simply can’t match. The dry heat caramelizes their sugars, giving your hummus a subtle depth that makes people ask what your secret ingredient is. Roasted beets also have a firmer texture that breaks down beautifully in the blender without adding excess moisture to your dip.
Boiling works faster, and it’s totally fine if you’re short on time. You’ll get a softer beet that blends easily, but the flavor will be more watery and one-dimensional. The cooking liquid pulls out some of those natural sugars and nutrients, which then get poured down the drain. Your hummus will still be pink, just not quite as vibrant or flavorful.
Personally, I roast whenever possible because the extra 20 minutes is worth it. The concentrated flavor means you can use less beet overall while still getting that knockout color. Wrap each beet individually in foil, roast until a knife slides through easily, then let them steam in their foil packets while they cool. That steam helps loosen the skins, which brings us to the next point.
Seriously, don’t skip the peeling part
Beet skins are tough, fibrous, and they’ll leave your hummus with weird stringy bits that get stuck in your teeth. Even after roasting or boiling until tender, those skins don’t break down in the blender. You’ll end up with little purple flecks throughout your dip that look unappetizing and feel gritty on your tongue.
Peeling is actually easiest right after cooking while the beets are still warm. The skins slip off with just a gentle rub using a paper towel or your fingers under cool running water. Wearing gloves is smart unless you want hot pink hands for the next two days. The pigment in beet skins is incredibly stubborn and will stain everything it touches.
Leaving the skins on also affects the color in ways you might not expect. Instead of that clean, bright pink, you’ll get a muddier, darker shade with brown undertones. The outer layer contains different compounds than the flesh, and they don’t blend into the same cheerful hue. Taking three minutes to peel makes the difference between hummus that looks professionally made and something that looks like you forgot a step.
Beyond aesthetics, unpeeled beets can add a slightly bitter edge that clashes with the creamy, tangy profile you’re building with tahini and lemon. That bitterness comes from compounds concentrated in the skin, and no amount of garlic or cumin will mask it completely. Your texture suffers, your color suffers, and your flavor profile takes an unnecessary hit. Just peel the dang beets.
My take on the perfect chickpea base
Getting your chickpeas right makes or breaks the whole hummus experience. You can’t just toss whatever’s in your pantry into a food processor and hope for the best – well, you can, but you’ll end up with grainy, bland hummus that tastes like disappointment. The chickpea base needs to be creamy, neutral enough to let the beetroot shine through, and smooth enough that every bite feels luxurious on your tongue.
Texture matters more than you might think. When your chickpeas are properly prepared, they blend into this silky, almost whipped consistency that makes store-bought hummus taste like gritty paste. You’re looking for that restaurant-quality smoothness where the hummus doesn’t separate or feel chalky. The difference between good hummus and great hummus often comes down to how you handle these little legumes.
Chickpeas also bring more to the table than just bulk. They’re packed with plant protein, fiber, and a subtle nutty flavor that complements the earthy sweetness of roasted beets perfectly. When you nail the base, everything else falls into place – the tahini integrates better, the lemon brightens without overpowering, and that gorgeous pink color stays vibrant instead of looking muddy.
Why canned chickpeas are honestly fine
You don’t need to soak dried chickpeas overnight and babysit them on the stove for hours. Canned chickpeas work beautifully for hummus, and anyone telling you otherwise is making this harder than it needs to be. The canning process actually softens the chickpeas in a way that’s perfect for blending, and you’ll save yourself at least two hours of active cooking time.
Quality does vary between brands, though. Some canned chickpeas are firmer and hold their shape better (great for salads, not ideal here), while others are softer and practically dissolve when you blend them. Look for chickpeas that feel tender when you press one between your fingers – they should give easily without being mushy. Draining and rinsing them removes that weird canned taste and excess sodium that can throw off your seasoning.
One trick that elevates canned chickpeas: simmer them in fresh water for about 10 minutes before blending. This extra step softens them even more and helps their skins slip off easily, which is the real secret to ultra-smooth hummus. But if you’re short on time, straight from the can works too – just make sure you blend longer and add enough liquid to compensate.
The secret to a super smooth texture
Removing the chickpea skins transforms your hummus from grainy to restaurant-grade. Those translucent little jackets might seem harmless, but they’re what create that slightly gritty mouthfeel that screams “homemade” in the wrong way. Peeling them is tedious, sure, but you don’t have to get every single one – even removing half makes a noticeable difference.
The easiest method involves rubbing the chickpeas gently between your hands or in a clean kitchen towel after they’ve been cooked or warmed. The skins slip right off and float to the top when you cover them with water, making it easy to skim them away. Some people skip this step entirely and just blend longer, which can work if your food processor is powerful enough, but you’ll never achieve that same silky consistency.
Blending order matters just as much as what you blend. Start with your tahini and lemon juice first, whipping them together until they’re light and creamy before adding anything else. This creates an emulsion that helps everything incorporate smoothly. Then add your chickpeas gradually while the motor’s running, along with ice-cold water a tablespoon at a time. The cold water helps the mixture stay emulsified and prevents it from getting warm and separating during the blending process.
Your food processor needs to run longer than you think – we’re talking three to five minutes of continuous blending, stopping occasionally to scrape down the sides. That’s when the magic happens and the hummus goes from chunky to cloud-like. Don’t rush it, and don’t worry if it seems too
Let’s actually make the stuff
You’ll want to start with roasted beets that have cooled completely. Warm beets create a watery mess in your food processor, and nobody wants that. Toss your drained chickpeas, chopped beets, tahini, garlic, lemon juice, and a good pinch of salt into the bowl. Pulse everything a few times to break it down before switching to a continuous blend.
Drizzle in your olive oil while the machine runs. This is where the magic happens – the oil emulsifies with the chickpeas and tahini to create that silky texture you’re after. Stop every thirty seconds or so to scrape down the sides. Some chunks always try to escape the blade.
Taste it now and adjust. Maybe it needs more lemon for brightness, or another clove of garlic if you’re feeling bold. The color should be that stunning hot pink that makes people stop scrolling on Instagram. Blend for another minute until it’s completely smooth, and you’re done.
The step-by-step breakdown
| Step 1 | Add 1 can drained chickpeas, 1 medium roasted beet (chopped), 3 tablespoons tahini, 2 garlic cloves, juice of 1 lemon, and ½ teaspoon salt to food processor |
| Step 2 | Pulse 8-10 times until roughly chopped and combined |
| Step 3 | Turn processor on and slowly drizzle in ¼ cup olive oil through the feed tube |
| Step 4 | Blend for 2-3 minutes, stopping to scrape sides every 30 seconds |
| Step 5 | Taste and adjust seasoning with more salt, lemon, or garlic as needed |
| Step 6 | Blend for final 1 minute until completely smooth and creamy |
Your food processor does most of the heavy lifting here, but don’t rush it. Each ingredient needs time to break down and meld together. The first pulse stage prevents the motor from seizing up when it hits those whole chickpeas and beet chunks.
Scraping the sides isn’t optional. Chickpea bits love to cling to the bowl, and if you don’t incorporate them back in, you’ll end up with an uneven texture. Some parts will be silky while others stay grainy and rough.
The final minute of blending transforms the mixture from “pretty good” to “restaurant quality.” You want zero graininess when you drag a spoon through it. If you still feel texture, keep going – your processor can handle it.
How to fix it if it’s too thick
Thick hummus happens to everyone. Sometimes the chickpeas absorbed less liquid than usual, or your beets weren’t as juicy as mine. Don’t panic and don’t dump the whole batch. Add one tablespoon of ice-cold water at a time while the processor runs. The cold temperature helps maintain that creamy emulsion instead of breaking it.
Ice water works better than room temperature because it keeps everything stable. You can also use the liquid from your chickpea can (aquafaba) if you saved it – that stuff adds extra creaminess. Stop adding liquid the moment your hummus reaches a smooth, scoopable consistency that holds its shape but isn’t stiff.
What should you dip in this?
Warm pita triangles are the obvious choice, but you’ll want to branch out from there. Toasted sourdough strips work beautifully, giving you that satisfying crunch against the smooth hummus. Crackers are fine if that’s what you’ve got, though I find the thicker, seedy varieties hold up better than those flimsy water crackers that break the second they hit the dip.
Raw vegetables bring their own sweetness that plays off the earthy beets. Carrots and bell peppers are your standard options, sure, but don’t sleep on radishes or jicama. Cucumbers offer a cool, refreshing contrast. Celery might seem boring, but its crispness and slight bitterness actually complement the hummus better than you’d think.
Pretzels add a salty element that balances the natural sweetness of the beetroot. You can also spread this on wraps or use it as a sandwich base instead of mayo. Some people even use it as a pasta sauce, thinned with a bit of pasta water. That’s getting a little creative for my taste, but hey, you do you.
My favorite pita and veggie combos
Whole wheat pita cut into sixths and warmed in a dry skillet for about thirty seconds per side creates the perfect vehicle. The slight char on the edges adds a smoky note that works with the beets. White pita is softer and more neutral if you prefer that, though I find it gets soggy faster when you’re really loading up on the hummus.
Rainbow carrots aren’t just pretty – they actually taste different from each other. Purple carrots have a peppery bite, yellow ones are milder, and the orange ones you know well. Cutting them on a diagonal gives you more surface area for scooping. Bell peppers should be thick-walled and crisp; those thin, floppy ones from the discount bin won’t cut it here.
Blanched green beans might sound weird, but trust me on this one. You want them just barely cooked, still snappy, cooled completely before serving. Persian cucumbers are better than English ones for dipping because they’re firmer and less watery. Cherry tomatoes work if you spear them with a toothpick first – otherwise you’re just making a mess.
Storing it so it doesn’t get weird
Glass containers with tight-fitting lids are your best bet for keeping this hummus fresh. Plastic can absorb the beet color and end up permanently stained, which doesn’t affect the taste but looks pretty gnarly. You’ll want to press a piece of plastic wrap directly onto the surface of the hummus before sealing the container – this prevents that dried-out skin from forming on top.
Refrigeration is non-negotiable here. This will keep for about five days, maybe six if you’re being really careful about not double-dipping. The color might deepen or darken slightly over time, which is totally normal. If you see any liquid separating out on top, just stir it back in. That’s the tahini oil, and it’s supposed to be there.
Freezing works if you’ve made a huge batch, though the texture gets slightly grainy when thawed. Portion it into smaller containers so you can defrost just what you need. Thaw overnight in the fridge, never at room temperature. Give it a good stir and maybe a drizzle of olive oil to bring back some of that silky texture.
Smell is your best indicator of whether it’s still good. Fresh hummus has a clean, earthy scent with hints of lemon and garlic. If it starts smelling sour or funky, toss it. Mold is obvious – you’ll see fuzzy spots, usually starting around the edges where air exposure is highest. When in doubt, throw it out. Food poisoning from bad hummus isn’t worth the risk.

Conclusion
You’ve got a dip that’s as good for your body as it is beautiful on your table. Beetroot hummus delivers all the protein and fiber you’d expect from traditional hummus, plus the added bonus of nitrates that support healthy blood flow and stamina. The earthy sweetness works with tahini and lemon in a way that feels both familiar and completely fresh.
Your batch will keep in the fridge for up to five days, though it rarely lasts that long once people discover it. The color might darken slightly over time, but the flavor actually improves as the garlic mellows and the spices meld together. Pack it in an airtight container and you’ll have a ready-to-go snack that beats anything you’d grab at the store.
This recipe adapts to whatever you have on hand. Roasted beets instead of raw? Go for it. No tahini? Almond butter works. You can make it spicier, tangier, or sweeter depending on your mood. The basic formula is forgiving enough that you’ll probably develop your own signature version after a few tries.